As you know, in June we went to Carolina Beach for Vacation. And I knew when we got back that I wanted to make a shadowbox with our pictures, sand and shells. I grabbed some supplies at JoAnn Fabrics as soon as we got back, but I just got around to putting everything together. And I am super happy with how it came out!
Here is where I started. I swung by good ole Joann's, and went bankrupt on a ton of crap. The essentials:
1- first things first, the shadowbox! they come in a bunch of sizes, both square and rectangle.
I went with the largest rectangle one I could find
2- scrapbook paper for the background pick one that coincides with your vacation theme,
whether it be beach, city, skiing, etc.
3- adhesive I used both double sided tape (that green thingy) and a glue pen
4- embellishments i grabbed all sorts of things that I thought would look cool; metal word stickers, post-it flags, cute little paper clips, and different styles of letter stickers
5- don't forget pictures! I have this VuPoint Cube Printer that is super handy, I just dock my iPhone, pick the size and print! I printed pics in two sizes for a little variety
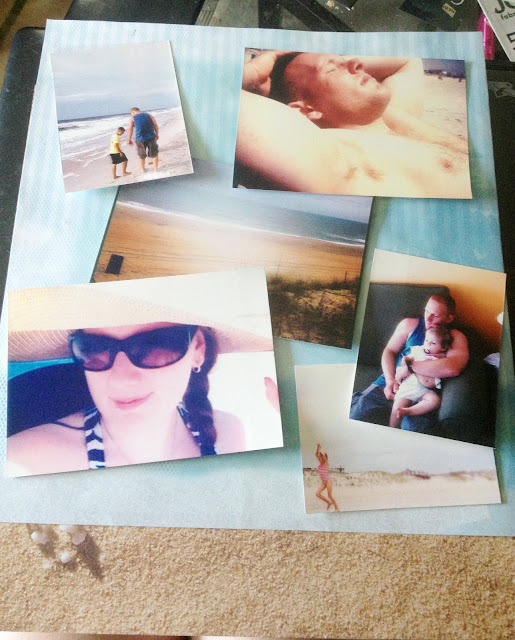
Step 2: Get an idea of layout. Before you just start gluing stuff down willy-nilly, you will want to get a general idea of where you want your pictures to go. I just wrapped the paper around the cardboard insert that came in the frame. Keep in mind where you might want to place your embellishments and words also. I knew I wanted to put words in the upper left corner, so I used a smaller photo, with not much going on up at the top that I would mind covering up.
 |
| I had to use two pieces of paper, since the 12x12 paper wasn't long enough. I used a sand print since I knew it would mostly be covered up with actual sand anyway. |
Step 3: Glue that ish. It's now or never. I used the double sided tape in strips on the back of each photo, and the glue pen on the corners to keep them from peeling up. Tip: on the pictures that I used the little flag paper clips, I put those on before I glued, so those stayed in place as well.
I wish I had been better about taking a pic after this step,
but I was too into my work to stop to take one
Step 4: Embellish! This is the fun part! Play around with your extras until you like how it looks. Tip: I cut the letters out of the bigger sheet, so I could move them around while they are still on their backing.
Step 5: Time to play in the sand! This step required some trial and error, and I dumped the sand out and started over at least once. What I did was I laid the frame down, and poured the sand at the bottom. Then I placed the seashells and sea glass we collected along the top of the sand line. We also shared a bottle of bubbly while we were there, so I added the cork. I cut the cork in half with a serrated knife so that it would fit.
Step 6: Replace collage and frame backing. Tip: The first time I did this, I was all excited to see the finished product, so i tipped it up, and sand of course started pouring out the bottom. So what did I do? Well after a moment of defeat and panic, I grabbed my good friend Mr. Duct Tape, and sealed up the bottom, making sure to press the duct tape firmly into the seams and corners of the bottom 2 inches. Worked like a charm.
And that's it, folks! I am really happy with how it came out, especially since the whole sand business was trial and error. The only thing I wish were different is I wish you could see the seashells and sea glass a little bit better. Maybe down the road I will try and figure out how to get in there and move stuff around without a total overhaul. But overall I am loving it!! When can we go back??


Perfect love it!!
ReplyDeleteThank you! When I was printing pictures I realized I didn't have a single one with you in it! We still love you though :)
DeleteOh my gosh that is the cutest!!!!!!
ReplyDelete